When it’s blistering hot outside, our hair often gets hard to manage – the dreaded frizz springs to mind. We want simple and quick styles that keep us looking glam, and styles that meet that criteria are exactly what I’ll be sharing with you.
Before I share with you my top five hairstyles to wear in the heat, I wanted to touch on looking after your hair/head in the heat. Like your skin, you should also protect your hair in the sun. Because like your skin it can also become damaged. An important factor which is often overlooked is sun protection for your scalp – if you’ve ever been unfortunate enough to burn your scalp, you’ll know how painful it can be.
It is worth applying a small amount of lotion to the parts of your scalp which are exposed to the sun, a little grease in your hair is worth it. This will also help keep the braids in place without flyaway hairs – an added bonus! Also, when you can I would advise wearing a sun hat to protect your hair and head from the sun.
To get the best results from your hair in the heat, where it is often humid – which means frizz. I recommend using BeautyCounter‘s Smooth and Control range, I use their shampoo and conditioner while in the shower.
After the shower, I like to use the smooth and control hair oil. This prevents frizz and flyaway hairs, which helps you to achieve sleek and smooth looks. This range can be used for both of those of you with curly and straight hair.
Like all the BeautyCounter products which I speak so highly of, it is also reassuring to know that these products are free from preservatives, mineral oil, or silicones. They are instead replaced with goodness, which includes a blend of eight oils and nourishing vitamin E.
The Styles
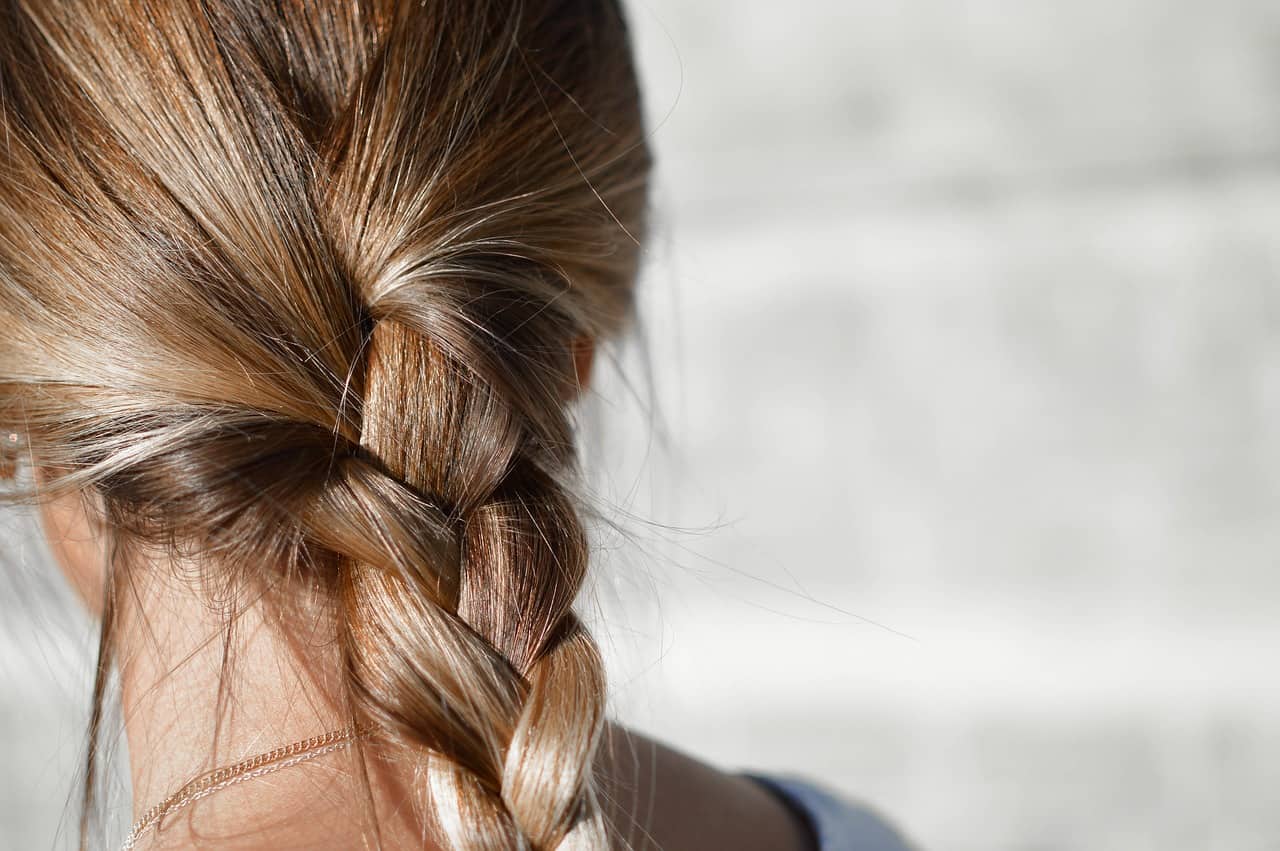
French Braid
This braid is also known as an invisible braid and blends in with the hair. I will be explaining how to do one braid in your hair. Once you have mastered this you can use this style in different ways. For example, to create two French braids on each side of your head, the only difference is when you begin the braid to grab the hair in a triangle shape at the start of the braid.
What you’ll need:
- One Hair Tie
How To:
To create one braid
- At the front of your head grab three equal strands of hair.
- Grab the strand from the far left, weaving it over the middle section and under the right section.
- Now you have created the beginning of the braid, then grab a small strand of loose hair from the left side of your head and add it to the left side of the braid.
- Move the left strand over the middle.
- Repeat this process from the right side.
- And continue this process (the smaller the strands you take, the more professional the braid will look).
- When you come to the nape of your neck, you should have picked the remaining loose hair up.
- To finish the braid secure the end with a hair tie.
Dutch Braid
To create two braids on either side of your head. This braid is more visible than a French braid, the difference between them is that you braid underneath rather than over with a Dutch braid. Because of this the Dutch braid is often referred to as a reverse braid.
What you’ll need:
- Two Hair Ties
- A sectioning clip
- A comb
How To:
- Create a centre parting using a comb for precision.
- Divide the hair into two equal sections, clipping the side you’re not braiding out of the way with a sectioning clip.
- Grab hair at the front of your scalp in a triangle shape.
- Split the hair you have grabbed into three equal sections.
- Take hair from the left and cross it under the middle section and over the right section.
- Then take a small amount of hair from the loose hair and add this into the left section and put it under the middle section.
- Again, grab a small amount of hair from the right side and add this to the right section.
- Continue this process.
- Secure the bottom of the braid with a hair tie.
Beachy Waves
This style is a perfect holiday look
What you’ll need:
- BeautyCounter Style Sea Salt Spray
How To:
- Use the salt spray by spritzing it through damp hair to create subtle texture and movement.
- Let your hair dry slowly in the sun – rather than blasting it with a hairdryer.
- Use your hands to encourage the shape by bending strands and wrapping them around your fingers and even poker-straight hair will start to have movement.
Knots
This look is perfect for getting hair off your face and neck in the sun. It is chic and perfect for several occasions such as to the beach, a wedding or just running your day-to-day errands. This works on most styles, from bobs to long length locks.
What You’ll Need:
- A detangling brush
- Hairpins
How To:
- Start by creating a centre parting.
- Working on one side, take a section at the front, divide in two and knot the two strands together so they feel tight.
- Then, working backwards, take pieces of hair from each side, add to the section and knot again.
- Carry on until the nape of your neck, twist into a bun and pin in place.
- Repeat this on the other side and wrap remaining hair into the bun.
Fishtail Braid
This is one of the simplest braids but looks like you’ve spent hours on it.
What you’ll need:
- Two hair ties (an elastic one for the top of the hair, this will make it easier to cut out)
How To:
- Gather your hair over one shoulder.
- Tie in a pony with a thin elastic band.
- Divide the length into two sections.
- Take a small strand from the left, cross it over and add to the right.
- Then take a strand from the right, cross it over and add to the left.
- Repeat down the rest of your hair, then secure at the end and carefully remove the band from the top – it is easiest to cut this out with scissors
- To create a beachier look, you can loosen the hair from the braid by gently pulling it out.